10 Tips for Choosing the Best LED Fixtures?
Choosing the right LED fixtures is rarely as simple as comparing wattage and price. A fixture may look efficient on paper yet create glare, uneven illumination, or disappointing color in a real room. The ceiling height, surface finish, operating hours, maintenance access, and intended task all influence the result. Sometimes, the cheapest option becomes the most expensive mistake.
Lighting engineer James R. Benya, PE, FIES, has emphasized, “Light should serve the task, not compete with it.” That principle gives this guide a practical foundation. Good lighting should help people read labels, notice hazards, prepare food, or move safely without forcing their eyes to work harder. It should also fit the space’s electrical system and environmental conditions. A damp warehouse, a retail display, and a home office need different solutions.
Details matter.
This guide, “10 Tips for Choosing the Best LED Fixtures,” examines those decisions from an experienced buyer’s perspective. It considers lumen output, beam angle, color temperature, color rendering, dimming compatibility, rated life, heat management, and warranty support. It also looks beyond technical specifications. Installation quality, controls, replacement planning, and actual user comfort deserve equal attention. I have found that product sheets rarely reveal everything. A fixture can meet its advertised rating and still feel wrong after installation. That possibility deserves honest consideration. The best choice is not always the brightest or newest model. It is the fixture that delivers dependable, comfortable light for the people and tasks it serves.
Define Lighting Needs and Installation Conditions
10 Tips for Choosing the Best LED Fixtures
Define Lighting Needs and Installation Conditions
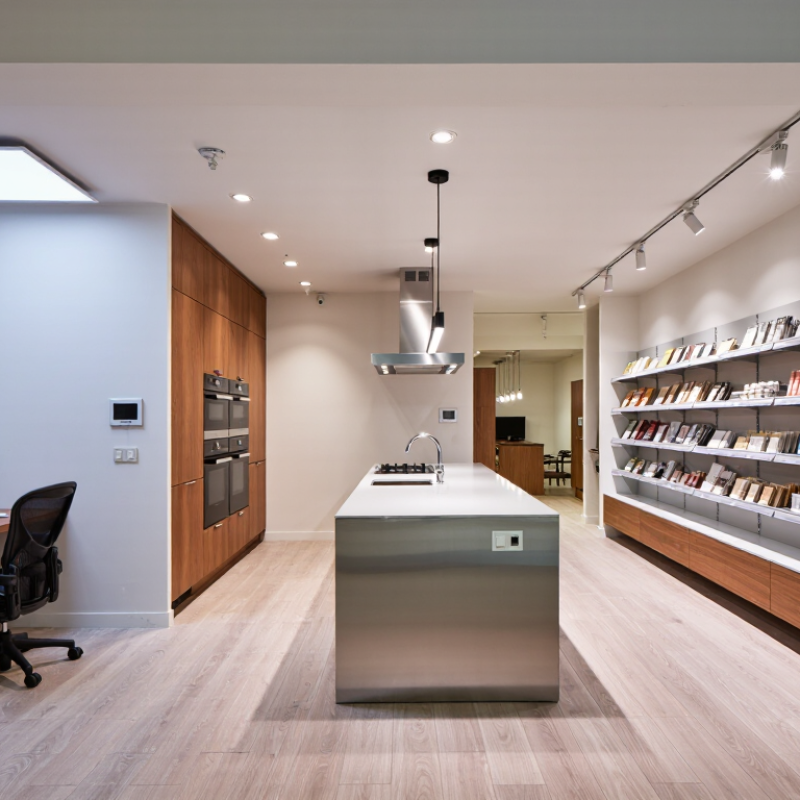
Choosing an LED fixture starts with the space, not the product label. Measure the room, ceiling height, and work surfaces. Check the ceiling.
A kitchen counter may need focused task lighting, while a hallway needs even, low-glare illumination. Estimate the required brightness in lumens, then consider color temperature and color rendering. Neutral white often suits workshops, but warmer light can feel better in living areas. High color rendering matters where people inspect colors, food, fabrics, or finishes. Beam angle also changes the result. A narrow beam creates strong highlights, while a wide beam reduces dark patches.
Installation conditions can quietly determine performance. Confirm the available voltage, junction box position, ceiling material, and mounting space. Recessed fixtures need enough clearance for heat to escape. Poor ventilation can shorten the fixture’s life. Damp or wet locations require suitable protection ratings. Outdoor areas also face rain, dust, and temperature changes. Check whether the fixture works with existing dimmers or control systems. Flicker is easy to miss in a showroom, yet it may cause discomfort during long working hours.
A site survey usually prevents expensive mistakes. I have seen attractive fixtures fail because their housings were too deep or their beam spread was overlooked. That assumption can fail.
Leave access for maintenance, and verify local electrical requirements with a qualified installer. “Almost compatible” is not compatible. Record measurements and lighting goals before comparing prices, because a cheaper fixture may deliver uneven light, higher heat, or difficult replacement.
Compare LED Fixture Types and Light Distribution
Choosing the best LED fixture starts with the space, not the product label. In site assessments, I compare mounting height, task locations, ceiling color, and existing shadows. A panel fixture can provide broad, even light in offices, but poor placement may create screen glare. Linear fixtures suit aisles and long work areas because their shape follows the layout.
High-bay fixtures usually support tall ceilings and concentrated downward light. Flood-style fixtures spread light across walls, yards, or loading areas. Narrow beam angles reach farther, while wide beams reduce harsh bright spots near the floor. Watch the edges. Light distribution often matters more than wattage.
Review the photometric report, especially the beam pattern, spacing criteria, and uniformity values. Do not judge performance from lumens alone. A fixture with high output can still leave dark corners or uncomfortable glare. Check the mounting height used in the test, because results can change significantly on site. Diffusers may soften light, but they can also reduce usable output.
I prefer mockups when the room has reflective floors, shelves, or unusual ceiling structures. Measure illumination at the actual workplane, not only beneath the fixture. Controls and dimming can improve comfort, though poorly configured sensors may cause distracting changes. My own first layout is rarely perfect. Rechecking shadows after installation is worth the extra effort.
10 Tips for Choosing the Best LED Fixtures — Compare LED Fixture Types and Light Distribution
How to read this chart: Typical efficacy shows how efficiently each fixture converts electricity into light, while beam angle indicates light distribution. Narrow beams suit accent and high-bay lighting; wider beams are better for open areas and general illumination. Values are representative commercial ranges and should be verified against project-specific datasheets.
- Match the fixture type to the mounting height and application.
- Compare delivered lumens rather than wattage alone.
- Choose beam angles according to room size and target area.
- Check color temperature for the intended visual environment.
- Consider color rendering for retail, hospitality, and display areas.
- Review glare control, shielding, and UGR requirements.
- Confirm ingress protection for damp, dusty, or outdoor locations.
- Evaluate dimming, occupancy sensing, and lighting-control compatibility.
- Check thermal management and the rated lifetime at the expected ambient temperature.
- Compare warranty terms, maintenance access, and total operating cost.
Evaluate Brightness, Color Quality, and Energy Efficiency
10 Tips for Choosing the Best LED Fixtures
Evaluate brightness in lumens, not watts. Watts measure energy use, while lumens show visible output. Match the fixture to room size, ceiling height, and task needs. A kitchen worktop may need stronger, focused light than a hallway. Check the beam angle too. A narrow beam creates bright pools, while a wide beam spreads light more evenly. I once selected a high-lumen fixture that produced harsh shadows because its distribution was wrong.
Color quality deserves equal attention. Look for a high Color Rendering Index, especially in kitchens, studios, retail areas, and bathrooms. Check R9 performance when accurate reds matter. Select a color temperature that suits the space. Warm white can feel comfortable, while neutral white often supports detailed work. Avoid choosing by appearance alone. Ask for independent photometric data, tested output, and clear performance documentation.
Energy efficiency involves more than low wattage. Compare lumens per watt, expected operating hours, and light loss over time. A fixture with better thermal management may maintain brightness longer. Confirm dimming compatibility and check for visible flicker, particularly near cameras or workstations. Review the driver, warranty, safety certification, and replacement process. These details are easy to overlook. I have also trusted attractive specifications without checking installation conditions, and that mistake can reduce real-world efficiency. Leave room for doubt, then verify the numbers.
Check Durability, Safety Ratings, and Maintenance Requirements
10 Tips for Choosing the Best LED Fixtures
Durability, safety ratings, and maintenance requirements often matter more than initial brightness. A bright fixture is not automatically a dependable one.
Inspect the housing for corrosion-resistant materials and solid seals. In damp areas, check the stated IP rating, not vague claims like “weatherproof.” Dust and moisture can enter through weak cable glands. Heat is another concern. Look for effective thermal management and operating-temperature information. Excessive heat can shorten LED and driver life.
Safety certification should match your location and installation type. Verify recognized testing marks, electrical ratings, grounding details, and emergency-use requirements. Local rules may differ, so consult a qualified electrician before ordering large quantities. Never assume a familiar-looking label proves compliance. That shortcut can create expensive problems.
Maintenance should be practical. Can workers reach the fixture without removing surrounding equipment? Are lenses, drivers, and seals replaceable? Check cleaning instructions, expected service life, warranty terms, and spare-part availability. A fixture installed twelve meters high may need special lifting equipment for a simple repair. Record installation dates and inspection results. Small records help reveal repeated failures.
Be realistic.
I have seen selection plans focus heavily on wattage while ignoring access and heat. That approach looks efficient on paper, but it can increase labor costs later. Even experienced buyers can miss a detail when specifications are rushed. Compare the technical sheet with the actual ceiling, weather, wiring, and maintenance conditions.
Assess Compatibility, Total Cost, and Warranty Coverage
Choosing the best LED fixture starts with compatibility, not appearance. Check voltage, dimming method, control protocol, mounting space, and ambient temperature. A fixture that flickers on an existing dimmer is not a bargain. I have seen projects fail because the driver was ignored. Measure twice.
The U.S. Department of Energy reports that LED products can use at least 75% less energy and last up to 25 times longer than incandescent lighting. However, rated life depends on heat, driver quality, switching cycles, and operating hours. Review LM-79 photometric data, LM-80 test results, and TM-21 projections where available. Confirm actual lumens, color consistency, beam angle, and expected maintenance access. The numbers matter.
Compare total cost, not only purchase price. Include installation labor, controls, replacement drivers, energy use, cleaning, and disposal. The International Energy Agency has identified lighting efficiency as a major electricity-saving opportunity, but savings vary with controls and occupancy. A high-efficiency fixture may recover its premium quickly in a warehouse, yet slowly in a lightly used corridor. My first cost comparison excluded lift rental, which made the payback look unrealistically attractive. Check the warranty next. Ask whether it covers the complete fixture, driver, labor, shipping, and lumen maintenance. Read exclusions carefully. A five-year term means little if coverage begins only after complicated registration. Keep invoices, test reports, and installation records; they support future claims and reveal whether the promised protection is practical.