How to Choose the Best LED Outdoor Lighting?
Choosing the right led outdoor lighting begins with the task, not the fixture. A driveway needs clear, even visibility; a building entrance needs comfortable light without harsh glare. The International Energy Agency reports that lighting uses about 15% of global electricity and produces roughly 5% of energy-related carbon dioxide emissions. Those figures cover lighting broadly, not outdoor products alone, but they show why efficiency deserves attention.
LEDs can reduce energy use substantially compared with older technologies. The U.S. Department of Energy notes that LED products use at least 75% less energy and can last up to 25 times longer than incandescent lighting. These comparisons are useful context, not a guarantee for every outdoor installation. Actual results depend on operating hours, fixture design, controls, and maintenance. Small details matter.
A practical choice starts with matching light output and beam shape to the space. Check the fixture’s lumen rating, color temperature, weather protection, and glare control. A wide beam may suit a path, while a shielded optic can keep light off nearby windows. Also review dimming compatibility, sensor settings, warranty terms, and replacement-part availability. A high efficiency rating alone cannot tell you whether light will land where it is needed. Nor does a premium fixture automatically fit every site. Compare manufacturer specifications with the site’s layout and intended use; where possible, inspect a sample after dark. There is no perfect specification sheet. The right choice balances visibility, comfort, durability, and operating cost, while leaving room to reassess once the lights are in use.
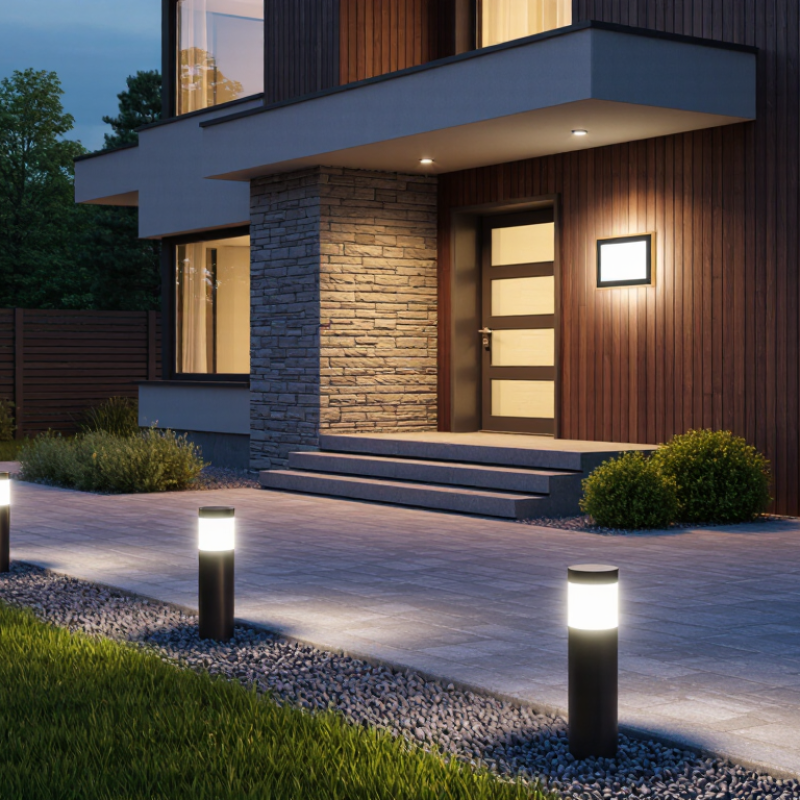
Identify the Outdoor Areas and Tasks That Need Lighting
Before comparing LED fixtures, walk around the property at dusk and note where people move, work, or need to see clearly. Do it at dusk. A front entrance may need light on the lock and house number, while steps and uneven paths need clear visibility underfoot. Check where shadows fall from trees, roof edges, or parked vehicles. I have found that a daytime inspection can miss a surprisingly dark corner.
Match the lighting to the task. A patio used for meals needs comfortable, even illumination across the table, not a harsh beam in someone’s eyes. A side gate may need focused light on its latch, while a driveway benefits from coverage that helps reveal people and obstacles without shining toward neighboring windows. Mark these areas on a simple sketch. It does not need to be perfect.
Notice when each space is used and whether existing lights already help. A motion sensor may suit a rarely used path, while a frequently used doorway may need steady, reliable light. Consider glare, nearby bedroom windows, and how bright surfaces look after rain. I still miss small shadows sometimes, so check the layout from the walking path, not only from the wall where a fixture might go.
How to Choose the Best LED Outdoor Lighting? - Identify the Outdoor Areas and Tasks That Need Lighting
| Outdoor Area | Main Task | Suggested Illuminance | Useful Light Characteristics | Controls and Placement | Weather Protection |
|---|---|---|---|---|---|
| Paths and garden walkways | Help people see the route and avoid obstacles | About 5–10 lux along the walking surface | Low-glare, downward-directed light; warm white around 2700–3000 K can preserve a relaxed garden feel | Space fixtures to provide even coverage; avoid placing bright sources at eye level | Choose outdoor-rated fixtures; use a suitable IP rating for exposure to rain and water spray |
| Steps, stairs, and changes in level | Make step edges and elevation changes easy to distinguish | About 10–20 lux on treads and landings | Consistent illumination with minimal harsh shadows; shielded step or wall lights can work well | Light each change in level without creating glare toward approaching users | Use fixtures and connections designed for the location and expected moisture exposure |
| Front door and entrance | Find keys, recognize visitors, and move safely through the doorway | About 20–50 lux on the entry area | Even light on faces and door hardware; 2700–3000 K is a common residential choice | Place lights to reduce shadows on the lock and avoid shining into neighboring windows | Select a fixture rated for its degree of exposure; covered entrances may need less protection than fully exposed locations |
| Driveway and parking area | Support vehicle movement, parking, and pedestrian visibility | About 5–10 lux for general residential use; use brighter task lighting where needed | Broad, controlled distribution to reduce dark patches and avoid glare for drivers | Mount and aim lights so beams stay on the property and do not shine into roads or homes | Use outdoor-rated equipment suitable for rain, dust, and the mounting environment |
| Patio, deck, or outdoor dining area | Support conversation, dining, and general movement | About 5–20 lux for ambient use; add focused light over work surfaces | Warm white around 2700–3000 K often creates a comfortable atmosphere; dimmable lighting adds flexibility | Use separate ambient and task-lighting zones where practical | Choose a rating appropriate to whether the fixture is sheltered or directly exposed to weather |
| Garage or workshop exterior | Illuminate vehicle access, tools, and outdoor work | About 20–50 lux for general tasks; detailed work may require more light at the work surface | Higher, even illumination with good color rendering helps users distinguish objects and colors | Position task lights to limit shadows cast by people, vehicles, or equipment | Check the fixture rating and installation instructions for the specific location |
| Perimeter, side yard, or rear access | Improve visibility around access points and less-used areas | About 5–20 lux where visibility is needed; avoid over-lighting the entire boundary | Shielded light aimed at the ground can provide visibility while limiting glare and spill | Motion sensors or timers can reduce operating time; aim lights away from neighboring properties | Use outdoor-rated fixtures and weather-resistant connections suited to the installation |
| Garden features and landscape accents | Highlight trees, walls, planting, or architectural details | Use modest, localized light; levels depend on feature size and viewing distance | Narrow or adjustable beams can emphasize a feature; avoid excessive brightness and light spill | Aim carefully and use timers or dimming to limit unnecessary nighttime operation | Ground-level fixtures should be suitable for soil contact, moisture, and the site’s drainage conditions |
Note: Illuminance figures are general planning ranges, not universal requirements. Confirm applicable local codes, site conditions, fixture instructions, and the actual light level at the task surface. Select IP protection according to the fixture’s exposure to dust and water, and use a qualified electrician where required.
Related Posts
-

How to Choose the Best LED Outdoor Lighting for Your Garden
-
Why Choose LED Outdoor Lights for Your Project?
-
What Are the Top 10 Outdoor Lights in 2026?
-
How to Improve Outdoor Safety and Energy Efficiency with LED Wall Packs
-
Top 10 LED Landscape Lights for Your Garden and Outdoor Space?
-
What is LED Landscape Lights and How to Choose the Best?