How to Choose the Best LED Landscape Lights
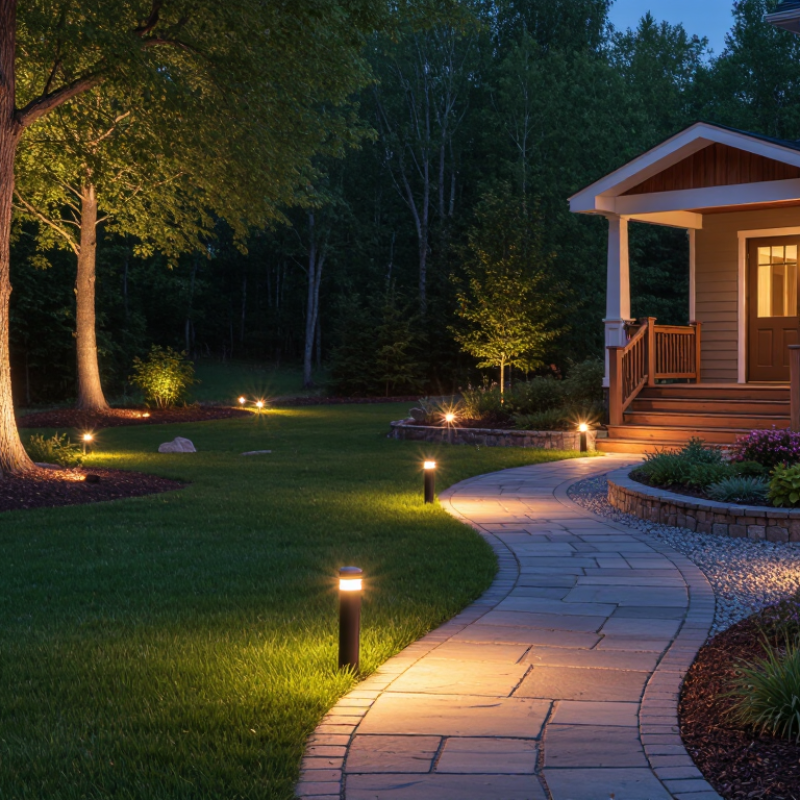
Choosing the best led landscape lights begins with noticing how your outdoor space is actually used. A stone path needs clear, gentle guidance. A broad oak may need only a soft beam across its trunk. A porch, steps, and garden beds each call for different light levels and beam angles. More brightness is not automatically better. Glare can hide details, disturb the calm of a yard, and spill light where it is not needed.
Landscape-lighting designer and author Janet Lennox Moyer’s work offers a useful principle: use light to reveal the garden, not overpower it. That distinction shapes every practical choice. Consider whether you need low-voltage wired fixtures or simpler solar options, and check the stated brightness, color temperature, weather resistance, and installation requirements. Look for sturdy housings and clear product specifications. Then think about placement. A fixture aimed from the wrong angle can create harsh shadows on a wall or shine directly into someone’s eyes.
Small changes matter. Try a warm beam along a walkway, or place a shielded spotlight below a tree canopy. Step back after dark and notice what feels comfortable—and what does not. Some corners may look better left dim. This guide will help you compare fixture types, match lights to landscape features, and plan a balanced layout. The process is not perfectly tidy; real yards have uneven ground, growing plants, and changing needs. Start with purpose, test carefully, and let the landscape remain visible as a landscape, not a showroom.
Assess the Landscape and Define Lighting Goals
Before selecting LED landscape lights, walk the property during daylight and note its shape, slopes, planting beds, paths, and existing wiring. Look for practical needs: a dark step, an uneven walkway, or a gate that is hard to find after sunset. Mark these spots on a simple sketch. It does not need to be perfect. An initial plan can look convincing on paper and still feel too bright outdoors.
Walk it at dusk. Notice where shadows fall and which views deserve attention, such as a textured stone wall or a small tree near the entrance. Decide whether each area needs safe passage, gentle accent lighting, or broader visibility. These goals call for different beam spreads and brightness levels. Avoid lighting every feature equally; overlapping beams can erase shadows and create glare. Check sightlines from inside the home, too, since a fixture aimed toward a window may be distracting. Consider nearby neighbors and dark areas used by wildlife. Needs can change with the seasons. Shrubs grow, branches move, and a path may become more shaded than expected, so leave room to adjust fixture angles later.
Compare Brightness, Color Temperature, and Beam Spread
How to Choose the Best LED Landscape Lights
Compare brightness, color temperature, and beam spread before choosing a fixture. Lumens indicate light output; watts indicate energy use. For a path, choose enough output to reveal edges without washing out nearby plants. A tree trunk may need a narrower beam, while a low flower bed often looks more natural under a wider one. Beam angles vary by fixture, so test the actual light pattern at night.
Color temperature shapes the mood. Around 2700–3000K gives stone and foliage a warm, gentle appearance; cooler light can make them feel stark. The U.S. Department of Energy’s Energy Saver guidance reports that LEDs use at least 75% less energy and can last up to 25 times longer than incandescent lighting. Those figures describe LEDs broadly, not every outdoor fixture. Small shifts matter. A carefully aimed light can still create glare, and my first beam choice would not always be the best one.
Tips: Test one fixture after dark before buying several. Compare its brightness, color, and beam spread from the viewing spot, then adjust its angle to limit stray light.
Select Fixture Types and Weather-Resistant Materials
A useful landscape-lighting plan starts with the job each fixture must do. Path lights should cast a low, even pool across walking surfaces, not shine into people’s eyes. Spotlights can pick out a tree trunk or textured wall, while well lights sit flush with the ground for discreet uplighting. Step lights help define changes in level. Small details matter. Before buying, mark likely fixture positions after dark with a flashlight. This reveals glare and dark patches that are easy to miss on a daytime sketch. It is tempting to add more lights, but excessive brightness can flatten the scene.
Outdoor fixtures face rain, soil, irrigation spray, temperature swings, and sunlight. Look for clear weather-resistance information, including an appropriate ingress-protection rating for the location. A sheltered eave and an exposed garden bed do not need the same level of protection. Aluminum with a durable coating, stainless steel, and UV-resistant polymers can all work, depending on construction and care. Check seams, cable entries, and lens seals; the material name alone tells little. Water always finds gaps. Ensure buried fixtures drain properly, and keep connections above standing water where practical. I would still recheck seals and finishes after the first wet season, because even a well-chosen fixture can age faster than expected in salty air or constantly damp soil.
Choose a Power System and Control Options
Choose the power system around the site, not just the fixture. Low-voltage systems are common for gardens because they use a transformer and are easier to extend in small sections. Check the total wattage before buying: add each light’s rating, then leave capacity for future additions. Long cable runs can cause dimmer lights near the end, so plan wire size and layout carefully. A small sketch helps. For mains-voltage lighting, have a qualified electrician assess installation and protection requirements.
Solar lights avoid trenching and wiring, but their output depends on sunlight, shade, battery condition, and season. A path that looks bright in July may feel dim in winter. That trade-off is easy to miss. For controls, photocells switch lights on at dusk, while timers can limit operating hours. Smart controls offer schedules and remote adjustments, though they add setup and maintenance. Choose outdoor-rated components, and place sensors where porch lights or passing cars will not confuse them. Test the system after dark; one poorly aimed sensor can make an otherwise careful plan frustrating.
Plan Fixture Placement and Test the Lighting Effect
Before choosing LED landscape lights, sketch the areas you want to illuminate: paths, steps, trees, and seating spots. Mark each fixture position on the sketch, then check it outdoors after dark. A light that looks well placed on paper may shine directly into a window or a neighbor’s eyes. Keep fixtures low beside walkways, and aim tree lights upward from a few feet away to reveal texture without exposing the bulb.
Test placement before permanent installation. Use temporary stakes or moveable lights, then view the scene from the path, patio, and inside nearby rooms. Let your eyes adjust. A bright spot can seem attractive at first, yet feel harsh after several minutes. Watch for dark gaps between path lights and shadows across steps. Small changes matter. Shift one fixture, change its angle, or test a warmer color temperature before adding more lights.
Check the effect on more than one evening, since wet leaves and pale paving can reflect light differently. Compare a lower brightness with a brighter setting; the gentler option often preserves detail and feels calmer. In practice, I would avoid lighting every feature equally, though that can be tempting. A slightly uneven result may look more natural, and you may need to revise your original plan. Keep cables clear of walking areas while testing, and follow the fixture instructions when making a permanent installation.